.png)
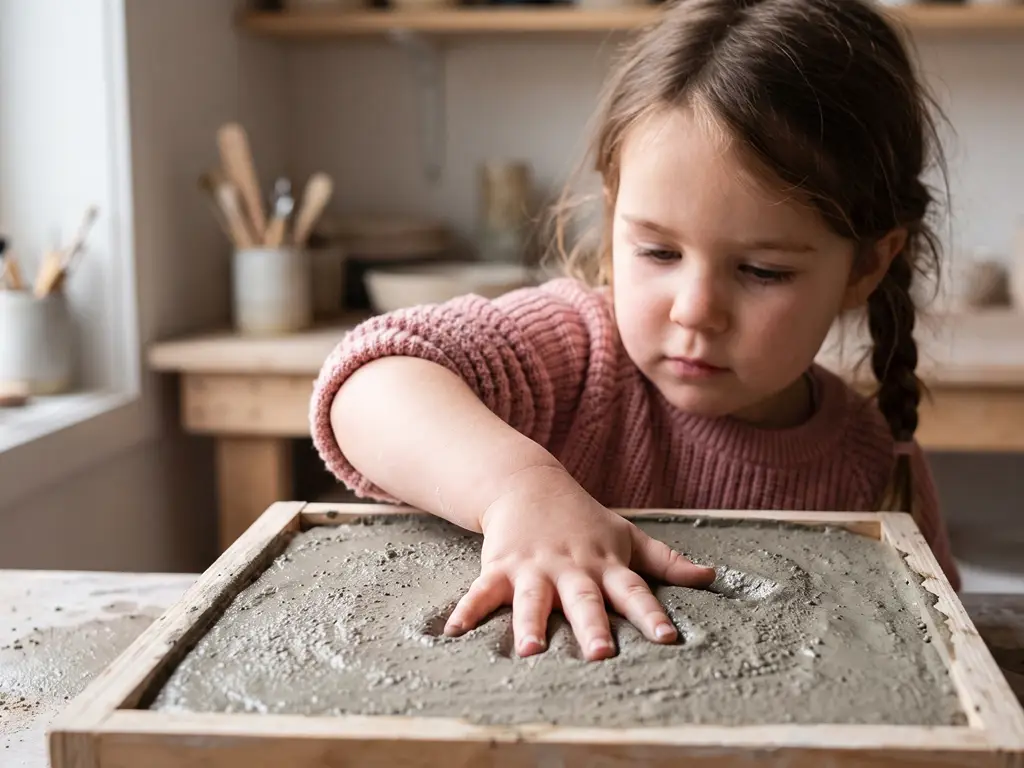
Making DIY stepping stones with your kids is one of those rare projects that checks every box: it’s creative, it’s hands-on, it gets everyone outside, and at the end, you have something permanent — a garden path, a flower bed accent, or a handprint keepsake you’ll treasure long after tiny hands have grown.
But if you’ve ever stared at a bag of concrete mix wondering whether your three-year-old is too young (or your ten-year-old too old), this guide is for you. We’ll walk through everything from materials and safety to age-specific design ideas, plus a dedicated section for teachers and group leaders planning a classroom project.
Getting Started: Materials, Tools & Age-by-Age Readiness
Before you open a single bag of concrete, let’s get two things straight: what you need, and whether your child is ready for this.
The five essentials you’ll need:
- Quick-set concrete mix — not plaster. Plaster stepping stones will crumble outdoors. A 10-pound bag from any hardware store covers 3–4 stones and costs around $8.
- A mold — aluminum pie tins, plastic plant saucers, or old cake pans all work. Just make sure it’s at least 1.5 inches deep.
- Release agent — petroleum jelly or cooking spray. Do not use vegetable oil; concrete absorbs it and the stone won’t release cleanly.
- Decorations — glass gems, mosaic tiles, pebbles, shells, marbles, beads, or buttons.
- Safety gear — rubber gloves and a dust mask. Wet concrete irritates skin; dry concrete dust is not something you want in small lungs.
Age-by-age readiness at a glance:
| Age Group | What They Can Do | What You’ll Need to Handle | Best Project Type |
|---|---|---|---|
| 3–5 years | Press handprints, place large decorations, choose colors | All mixing, pouring, and cleanup | Handprint keepsake stone |
| 6–8 years | Arrange mosaic patterns, assist with mixing (gloved), press decorations | Measuring water ratio, handling concrete waste | Mosaic or pattern stone |
| 9–12 years | Measure ingredients, mix concrete (with PPE), design layout independently | Confirming mix consistency, waste disposal | Advanced design or themed stone |
Two non-negotiable safety rules:
- Always wear gloves and a dust mask when handling concrete mix — even outdoors.
- Never wash concrete down the sink. Scrape excess into a trash bag and wash tools outside with a garden hose.
Step-by-Step: How to Make DIY Stepping Stones with Kids
Think of this project as having three phases: Prep & Pour (about 15 minutes), Decorate (about 20 minutes), and Wait (24–48 hours). The first two phases need you present; the third one handles itself.
Mixing & Pouring: Getting the Foundation Right
Set up outdoors on a tarp or drop cloth — this is not a kitchen-table project. Once your workspace is ready, follow these five steps:
- Coat the mold. Grease every inner surface with petroleum jelly or cooking spray. Miss a spot, and your stone may never come out in one piece.
- Mix the concrete. Pour dry mix into a bucket, then add water gradually while stirring. Aim for a consistency like thick cake batter — it should flow slowly but hold its shape. A good starting ratio is roughly 1 part water to 5 parts dry mix, but follow your bag’s instructions and adjust by feel.
- Pour into the mold. Fill to about 1–2 inches thick. Thinner than 1 inch, the stone will crack easily; thicker than 2 inches, it becomes heavy and dries unevenly.
- Tap out air bubbles. Gently tap the sides of the mold for about 30 seconds. Trapped air bubbles create weak spots that crack later.
- Wait for the surface water film to disappear. You’ll see a shiny layer of water (called bleed water) on top. Once it fades — usually 20–30 minutes — the decoration window opens.
Temperature matters more than most tutorials admit. If it’s below 50°F (10°C), the concrete won’t set properly. Above 90°F (32°C), it dries too fast and cracks. A mild spring or fall afternoon is ideal.
Decorating Techniques: Handprints, Mosaics & More
This is the part kids live for. Here’s how to get each technique right the first time:
Handprints and footprints. Wait until the surface water film disappears (about 10–15 minutes after pouring), then coat your child’s hand with petroleum jelly. Press firmly and straight down — don’t wiggle or the print blurs. Hold for 3 seconds, then lift cleanly. If the concrete is still too wet, the print will fill back in; if too dry, you won’t get an impression. The window is short but forgiving if you check every few minutes.
Mosaic and gem patterns. The secret to a clean mosaic is arranging your design on a flat surface before touching the concrete. Once you’re happy with the layout, transfer pieces one by one, pressing each until it’s flush with the surface — not buried, not sitting on top. Buried pieces disappear when the concrete dries; raised pieces catch toes and chip off.
Engraved names and dates. Wait about 20 minutes after pouring, then use a popsicle stick or pencil to carve letters and numbers. The concrete should feel like firm clay — too soft and the lines collapse, too hard and you can’t make an impression.
Nature prints. Press a large leaf (vein side down) or flower gently into the surface. Leave it in place until the concrete is mostly set, then peel it away to reveal a fossil-like impression.
Common Mistakes & How to Avoid Them
Even experienced crafters run into these. Here’s what to watch for:
- Concrete too runny or too dry. If it pours like water, add more dry mix a handful at a time. If it crumbles, add water by the tablespoon. The “thick cake batter” test never lies.
- Handprint disappeared overnight. The concrete was too wet when the print was made. Next time, wait longer before pressing — the surface should look matte, not glossy.
- Decorations sank below the surface. You pressed too early or too deep. Aim for flush-with-surface, and wait until the concrete can support a test piece without it sinking.
- Stone cracked during demolding. Either it was too thin (under 1 inch), wasn’t fully dry (give it at least 24 hours), or you forgot to grease the mold. Let it dry another day and try again gently.
Mold
Concrete
Tap
24h
Creative Design Ideas for Every Age
The right design isn’t the prettiest one — it’s the one that matches your child’s fine motor skills and attention span. Here’s what works at each stage.
For Ages 3–5: Handprint Keepsakes & Simple Impressions
At this age, it’s about sensory exploration more than a polished product. Your job is to handle the concrete work; your child’s job is to leave their mark — literally.
Handprint stones are the classic. Let them press one or both hands into the surface, then surround the print with a ring of large, colorful glass gems (at least 2 cm wide — small decorations are a choking hazard and too fiddly for little fingers). Total project engagement at this age is about 10–15 minutes, so have everything prepped before you bring them to the workspace.
Shell and pebble pressing is another winner. Collect large, smooth shells or pebbles on a nature walk beforehand, then let your child press them into the concrete in any arrangement they like. No pattern required — the joy is in the pressing.
For Ages 6–8: Mosaic Patterns & Color Play
This is the golden age for stepping stone projects. Kids can follow multi-step instructions, sustain focus for 15–25 minutes, and take genuine pride in the finished piece.
Broken-tile mosaic is the star here. Use old ceramic plates or tiles (wrap them in a towel and tap gently with a hammer — wear safety glasses). Let your child arrange the pieces into a pattern on a flat surface first: a sunburst, a rainbow gradient, their initial. Stick to 3–5 colors maximum so the final design reads clearly rather than turning into visual noise.
Geometric glass gem patterns are simpler but just as satisfying. Concentric circles, checkerboards, or color-sorted stripes all work well. The key is letting them plan the layout independently — step back and only intervene when pieces need pressing into the concrete.
For Ages 9–12: Advanced Designs & Independent Projects
At this stage, kids can handle nearly every step themselves — measuring water, mixing concrete (with gloves and mask), designing the layout, decorating, and cleanup.
Themed stepping stones let personality shine through. Ideas include: a garden label stone with the plant name and a painted border, a house number stone for the front walkway, or a pet memorial stone with the pet’s name and paw-print impressions. The goal is giving them ownership — you’re the safety supervisor, not the project manager.
Multi-technique combinations raise the bar: a mosaic border framing an engraved name and date, or a nature-print center surrounded by a glass-gem mosaic ring. At this age, attention span stretches to 30–45 minutes — enough to complete an entire stone in one session.
Scaling Up: Classroom & Group Project Planning
Making stepping stones with 25 kids is a different beast from a weekend project with one or two. But with the right setup, it’s entirely doable — and teachers on DonorsChoose and craft forums consistently report it as one of their most memorable classroom activities.
Materials math for groups. For every 10 children, budget about 40–50 pounds of concrete mix and at least 10 molds (disposable aluminum pie tins are the most economical, at roughly $1 each). This ensures every child has their own stone to work on simultaneously — no waiting, no bored kids.
The three-station workflow. Set up your classroom or outdoor space as a production line: Station 1 is the Mixing Station (an adult handles this), Station 2 is the Pouring Station (kids pour their own pre-mixed concrete into their greased molds), and Station 3 is the Decorating Station (kids press in their decorations). Rotate groups of 8–10 children through each station, allowing about 10 minutes per station. The entire class can cycle through in 35–40 minutes.
Cost breakdown: DIY vs. kits. DIY materials run about $2–3 per stone when buying in bulk. Pre-packaged stepping stone kits range from $5–8 per stone but save significant prep time. For a class of 25, DIY materials total roughly $50–75, while kits would run $125–200.
A hand-decorated concrete stone makes a wonderful garden keepsake. But for daily physical education, sensory training, or active play, the job calls for something different. Purpose-built balance stepping stones — the kind with anti-slip rubber bases, stackable designs, and safety certifications like CPC (U.S. Children’s Product Certificate), CE (EU compliance), and ASTM toy safety standards — are built for daily jumping, balancing, and play in a way that DIY craft stones simply aren’t. Manufacturers like Startinal produce these certified stones for schools, therapy centers, and daycares that need equipment children can use safely every day. If you’re outfitting a sensory path or active-play zone alongside your classroom DIY project, it’s worth knowing what certified options are out there.
Beyond the Craft: Skills Kids Learn Making Stepping Stones
A stepping stone looks like a garden decoration. But for your child, it’s four lessons folded into one hands-on hour.
As art educator Rachelle Doorley puts it in her TinkerLab framework, the most valuable children’s projects are those where the process matters more than the product. A stepping stone that cracks during demolding still delivered 45 minutes of fine-motor practice, creative decision-making, and scientific observation. The learning already happened.
Finishing Touches: Sealing, Curing & Display
Your stone is decorated and drying. Now what?
The curing timeline. Remove the stone from its mold after 24 hours, but don’t place it in the garden yet. It needs 48 hours before it can be safely moved, 7 days before light use, and a full 28 days for complete cure. Think of it like baking bread — it looks done before it’s truly ready inside.
To seal or not to seal. An outdoor stone needs protection. Outdoor Mod Podge works for decorative stones in sheltered spots. A clear, UV-resistant concrete sealer (labeled “for masonry”) is better for stones in full sun and rain. If you skip sealing entirely, expect natural weathering — some people prefer the aged look.
Stepping stone ideas for display. A single handprint stone makes a charming flower bed accent. A series of 4–6 mosaic stones creates a whimsical garden path. Lettered stones work as vegetable garden labels (“TOMATOES,” “BASIL”). A collection of stones made across multiple years becomes a timeline of growing hands. For the full stepping stone ideas rabbit hole — including garden path layouts and landscaping combinations — there’s a world of inspiration waiting once your first stone is in the ground.